Guide to Convert OST files to PST

The MailsDaddy OST to PST converter allows users to export Outlook OST files into multiple formats, including Office 365, EML, MSG, HTML, RTF, and more. Below, we provide a step-by-step guide on how this tool works.

How to convert OST to PST and various other file formats

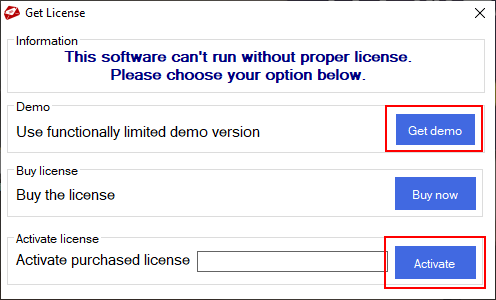
  1. Download the MailsDaddy OST to PST converter software from here. After installing, run the software and you will see the three options.

    • Get Demo: To check the functionality of the software.
    • Buy Now: To Purchase the paid version of the converter.
    • Activate: Enter the license key to activate the full version of the software.

    Activate and Get Demo
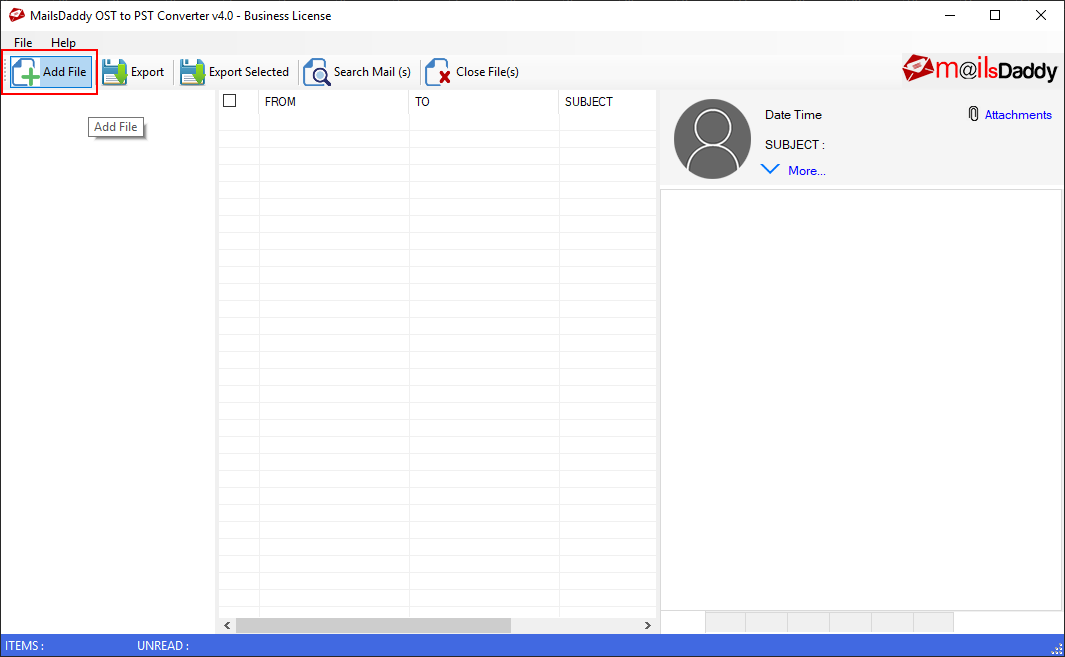
  2. Select Add file tab to upload the OST files whether they are corrupted or orphaned.

  3. Add Files
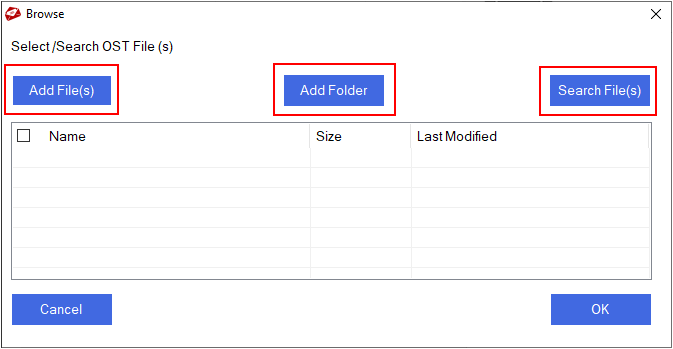
  4. A new window opens, presenting three options to add OST files: Add File: To add single or multiple files, Add Folder: For adding all files of the folder, and Search File: To search for OST files in your system. .

  5. Add File Add Folder Search File
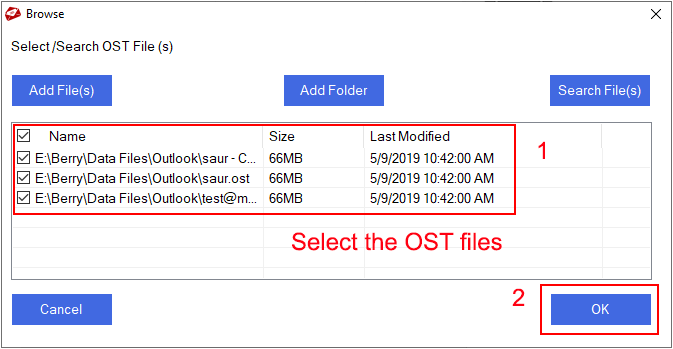
  6. Select the checkbox of OST files and click on the ok button.

  7. Select the OST file Ok
  8. The preview of the OST files will show up on the screen. You can view all OST file databases, like emails, contacts, calendar, notes, tasks, etc.

  9. See the OST files preview
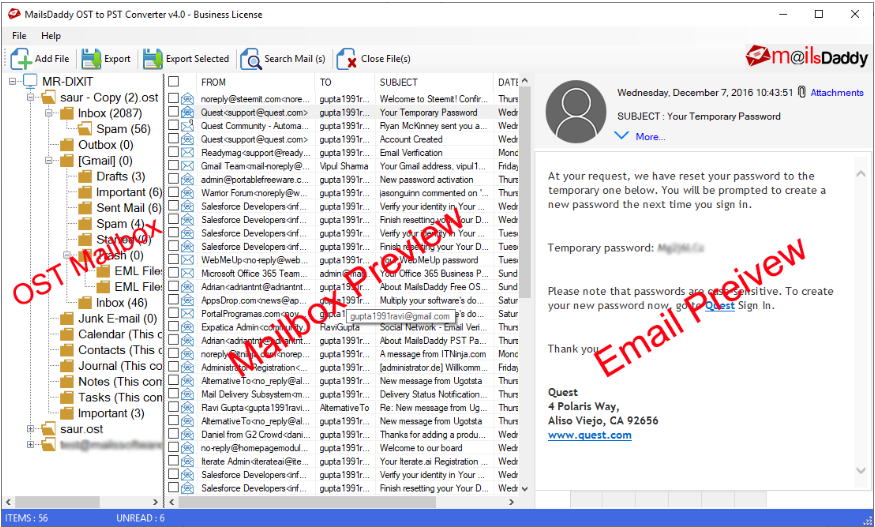
  10. Select the export button to trasfer the OST mailboxes.

  11. export
  12. A Export window will appear and the following steps are required to complete the conversion process.

    • Select the Export Folder: Either Select Export All folders or Export Selected Folders.
    • Select Export Options: You can export OST files to many format. You can choose any of the file format depending on your need.
    • Naming Convention: You can choose to save the emails by naming them with the subject or using other options.
    • Data Filter: Enter the data range for the time period you want the data.
    • Advance Options: Select the Create logs option to generate the report file of OST file conversion. (optional)
    • Designation Path: Select the local drive location to save converted PST file.
    • Click on Next tab.
    Get the export Window
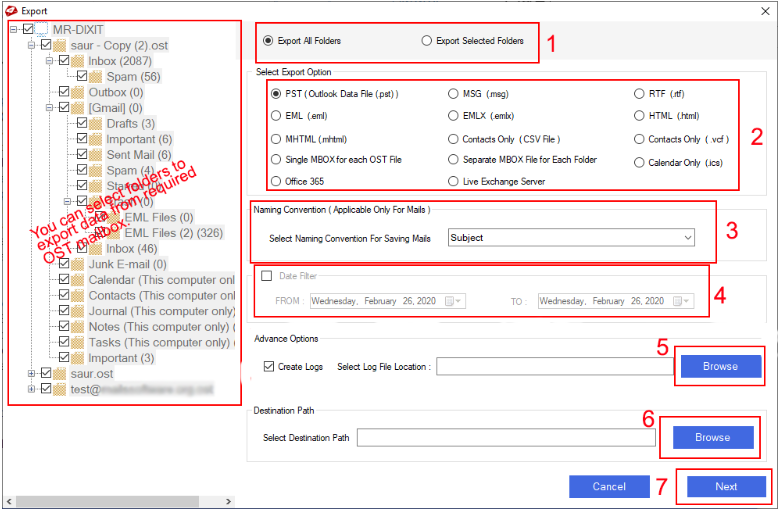
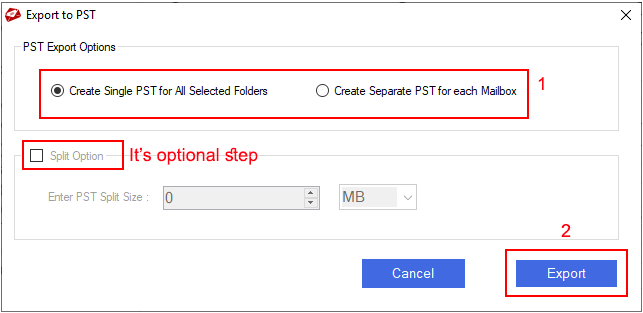
  13. Export to PST window will appear with multiple options as below:

    • PST Export Options: Select Create Single PST for All Selected Folders or Create Separate PST for each Mailbox.
    • Split Options: Use the PST Split option to fragment large OST file into small size of PST files. (optional)
    • Click on Export button to start OST to PST conversion process.

  14. Create single separate PST
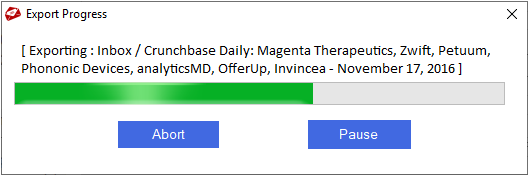
  15. OST export progress starts automatically and it will start converting and exporting PST files.

    Export Progress

MailsDaddy simplifies email migration with top-notch data recovery, backup, and migration solutions. Enjoy seamless, end-to-end services at an affordable cost.